You've seen the photos. Skis on a pack, a predawn start, skinning up a frozen glacial valley as the first light hits a legendary peak. The dream of linking turns down a high-altitude classic route is powerful. But the gap between dreaming and doing is vast, and it's filled with specific, often overlooked, preparation. This isn't just harder backcountry skiing. It's a hybrid discipline that demands alpine climbing fitness, mountain judgment, and ski technique that holds up when you're exhausted at 4000 meters. Let's cut through the Instagram fantasy and talk about the real work.
Your Quick Route to This Guide
How to Choose Your First High-Altitude Classic Route
Picking the right objective is 80% of your safety strategy. A common mistake is choosing a route based on its iconic status alone, ignoring the specific challenges that might be beyond your current skill set.
Let's say you're a competent backcountry skier comfortable on 35-degree slopes and have some basic glacier travel knowledge. Jumping straight to the Haute Route's classic variation is a solid step up. It's a multi-day tour with significant vertical gain, glacier travel, and a few steep cols, but it generally avoids extreme ski descents. The infrastructure (huts) provides a safety net. A step beyond that might be something like the Cosmiques Couloir near Chamonix. It's a single, sustained 45-degree line requiring confident steep skiing and rappelling skills, but the approach is relatively short.
Now, contrast that with a route like the North Face of the Matterhorn (a summer climbing route sometimes skied in extreme conditions) or the Marinelli Couloir on Monte Rosa. These involve serious mixed climbing, extreme exposure, and complex glacial approaches. These are for experts with years of layered experience.
Assessing Route Beta: Beyond the Guidebook
Guidebooks give you the line. Real preparation requires digging deeper. I spend hours on sites like Camptocamp.org and UKClimbing.com's logbooks, not just for recent conditions, but for the anecdotal details: "The bergschrund was easily passed on the skier's left in late May," or "The final couloir was wind-scoured and required crampons for 50m." This granular beta is gold. Contact local guiding offices. A two-minute call to the Compagnie des Guides de Chamonix or the Fitz Roy Chalten tourism office can give you current snowpack and access info you won't find online.
The Fitness Foundation You Can't Skip
High altitude punishes the unfit. Your training needs to mirror the specific torture of ski mountaineering: long, slow grinds with a heavy pack, interspersed with short, intense bursts.
Aerobic Base (Zone 2): This is non-negotiable. You need to be able to move for 6-10 hours at a conversational pace. Think long weekend hikes or runs, 2+ hours, building over months. This builds the mitochondrial efficiency that saves glycogen for when you really need it up high.
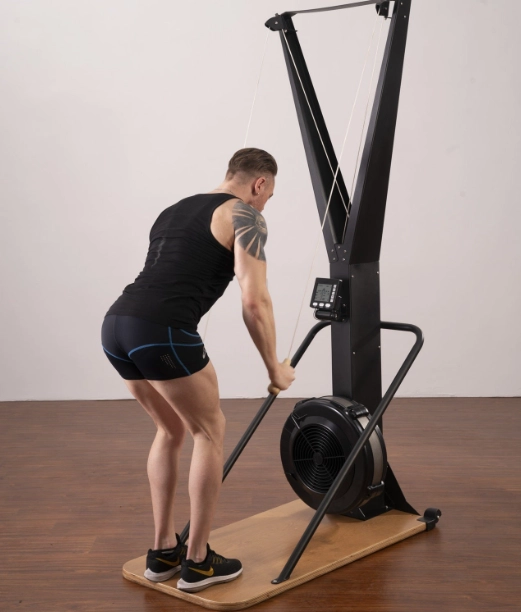
Strength-Endurance: Forget max bench press. You need legs and a back that can handle thousands of feet of vertical. Weighted step-ups (with a 40lb pack), lunges, and box steps are your bread and butter. A classic workout: 45 minutes on a stairmaster with a weighted vest, varying the step height and pace.
Here's a sample 12-week pre-trip training block structure. This assumes a baseline of fitness.
| Phase (Weeks) | Focus | Key Workouts | Volume/Intensity |
|---|---|---|---|
| 1-4: Base Build | Aerobic capacity & foundational strength | Long Z2 hikes/runs (3-5hrs). Full-body strength 2x/week. | Gradually increase duration by 10% weekly. |
| 5-8: Specificity | Mimic ski mountaineering demands | Heavy pack hikes (50+ lbs) on steep terrain. Interval sessions (e.g., 4x4min Z4 hill repeats). | Introduce 1 high-intensity session per week. |
| 9-12: Peak & Taper | Maximize fitness, then recover | Back-to-back long days on weekends. Reduce volume by 30% in week 11, 60% in week 12. | Focus on quality sleep and nutrition during taper. |
The subtle error? People train for the up, not the down. Your quads need to be strong enough to control skis in variable snow after 4000ft of climbing. Add eccentric leg exercises (like slow, controlled downhill lunges) to your regimen.
A Real-World Gear Breakdown: What You Actually Need
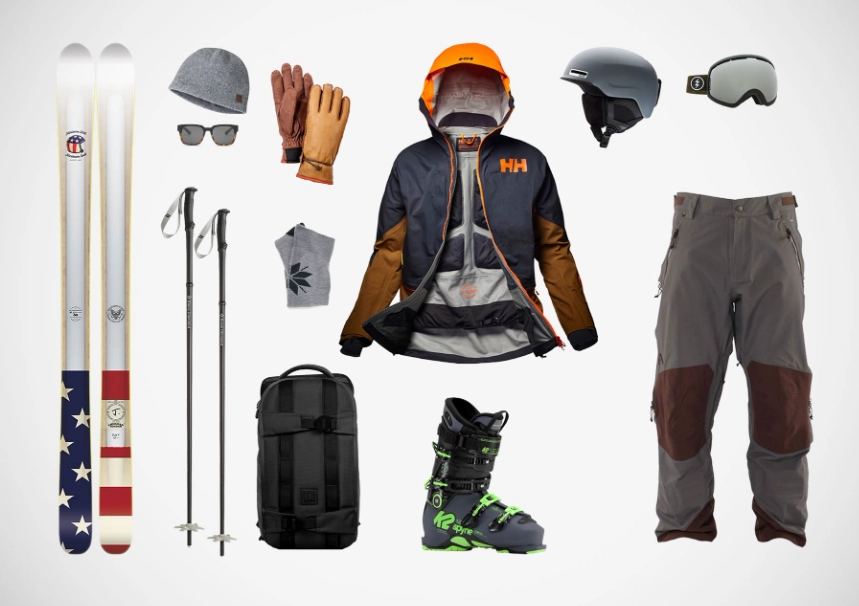
Your gear list is your life support system. It's a balance between weight and capability. Every gram counts, but so does reliability. I've seen too many people show up with brand-new, untested boots or a pack that doesn't carry skis well.
The Big Three (Boots, Skis, Bindings):
- Boots: You need a true ski mountaineering boot with a walk mode that actually works. Dynafit Hoji PX, Scarpa F1 LT, Salomon S/Lab MTN. Try them on with your intended ski socks. A blister at 3000m ruins everything.
- Skis: Aim for 95-105mm underfoot. Wide enough for variable snow, narrow enough to not be a boat anchor on the up. Length: go slightly shorter than your resort ski for maneuverability in tight spots. I'm a fan of the Black Crows Camox Freebird or the DPS Tour1 Wailer 106.
- Bindings: A tech binding like the Dynafit Rotation or ATK Haute Route. Reliability over fancy features. Carry spare parts (toe and heel springs).
The Safety Kit (Never Optional): This isn't a checklist; it's a system you must know how to use. Avalanche beacon (3-antenna modern model), shovel, probe. A 30-meter half rope (6-7mm) for rappels and crevasse rescue. A lightweight harness. Two ice screws (13-16cm). A couple of locking carabiners and slings. A basic first aid kit with a focus on trauma (tourniquet, hemostatic gauze) and blister care.
Clothing & Extras: Layering is everything. A thin merino base, a light fleece, a breathable hardshell, and a belay puffy (down or synthetic). Don't forget high-altitude sun protection: a serious mountaineering sunscreen (SPF 50), lip balm, and glacier glasses (category 4). A reliable headlamp with fresh batteries. I always pack a small thermos—a hot drink on a cold summit ridge is a massive morale booster.
The Skills They Don't Tell You About
You can be the fittest person on the mountain and still be a liability if your skills are one-dimensional.
Efficient Transitions: The clock is always ticking. Practice transitioning from skinning to bootpacking with crampons to skiing until it's muscle memory. Can you do it with cold hands, on a slope, in wind? Time yourself. A smooth transition saves energy and reduces exposure.
Mixed Movement: This is the subtle one. It's not just "climbing" or "skiing." It's the in-between: front-pointing up a 50-degree snow slope with your skis on your pack and an ice axe in each hand. It's side-stepping across an icy traverse in ski boots. It's making a short, awkward down-climb to access a couloir. These movements feel unnatural to pure skiers or pure climbers. Practice on low-consequence terrain.
Glacier Travel & Crevasse Rescue: If your route crosses a glacier, this is mandatory. Not optional. You need to know how to rope up, travel as a team, recognize crevasse danger, and perform a pulley-system rescue. A two-day course with a certified guide (check IFMGA or AMGA credentials) is the bare minimum. Reading about it doesn't count.
Skiing in Exhaustion: Your turns at the top of the last run of the day, after 8 hours out, matter more than your first powder turns. You need a conservative, energy-efficient skiing style for variable, often tricky snow. Practice skiing tired on low-angle slopes, focusing on balance and minimal, effective movement.
Putting It Together: Execution and Safety on the Mountain
Preparation meets reality here. All your training and gear means nothing without sound judgment.
The Turnaround Time: Set a hard turn-around time based on objective hazards (warming snow, afternoon storms, hut curfews) and stick to it. The summit is optional; the return is mandatory. I've turned around 200 meters from the summit of a classic route because the snow on the final face was warming to unsupportable mush. It stung, but it was the right call.
Weather & Avalanche Forecasts: You must synthesize multiple sources. Look at the European Avalanche Warning Services (EAWS) bulletin, but also study the high-altitude wind forecast (wind slabs are a major hazard). Sites like Meteoblue or Windy.com offer detailed mountain weather models. Understand what a sudden rise in temperature or a shift in wind direction means for your specific slope aspect.
Team Dynamics: Go with partners whose judgment you trust, not just whose company you enjoy. Discuss scenarios beforehand: "What if one of us gets altitude sickness?" "What's our plan if we see recent avalanche activity on the approach?" Clear, pre-established communication prevents conflict in stressful moments.
Ski Mountaineering Questions Answered
How do I know if my ski technique is good enough for a 40-degree classic couloir?
If you have to ask, it probably isn't. But here's a test: Can you consistently make controlled, linked fall-line turns on a 35-degree, firm, off-piste run at your local resort, without stopping to psych yourself up? Can you side-slip and hop-turn in a narrow chute? The couloir will be steeper, the snow often worse (wind-board, sun-crust), and you'll be fatigued. If you're not 100% confident in the resort analogue, hire a guide for a skills progression course first. It's cheaper than a rescue.
What's the most common mistake beginners make with altitude?
Rushing the ascent schedule. Your body needs time to acclimatize. The classic "climb high, sleep low" principle works. For a route starting above 3000m, plan at least two nights sleeping at 2500m+ beforehand. Hydrate aggressively (your pee should be clear), and understand that headaches and mild nausea are common; severe symptoms like ataxia (loss of coordination) or pulmonary edema require immediate descent. I take a low-dose aspirin starting a few days before to thin the blood slightly—a trick from a Himalayan guide—but discuss any medication with a doctor.
Is it irresponsible to do these routes without a guide?
Not necessarily, but it defines the required preparation. Without a guide, you are the guide. That means your skills in route-finding, hazard assessment, crevasse rescue, and emergency response must be dialed. You need more margin for error. For a first-time objective, going with a certified IFMGA guide is an incredible investment. They handle the stress of decision-making, letting you focus on learning and performance. For subsequent trips, a mixed team with experienced peers is the norm.
How do I train for skiing with a heavy pack?
You don't, directly—you avoid it. The goal of efficient ski mountaineering is to have your pack be as light as possible for the descent. That means stashing gear. You might climb the couloir with skis on your pack, ice tools, crampons, rope. But before you transition to ski down, you coil the rope, secure the tools and crampons tightly to your pack, and streamline everything. The weight will still be there, but it will be centered and tight. Practice skiing with a lightly weighted pack (10-15 lbs) in variable conditions to get used to the balance shift.
The path to skiing a high-altitude classic is a cumulative one. It's built from hundreds of days of touring, dozens of skills sessions, and a mindset that respects the mountain's scale. There are no shortcuts. But the payoff—standing atop a line you've studied for years, with the skills and fitness to enjoy the descent—is a feeling that defines the sport. Start small, train specifically, gear up thoughtfully, and always keep something in reserve. The mountains aren't going anywhere.
Related Articles
Comments
Join the discussion